
Introduction
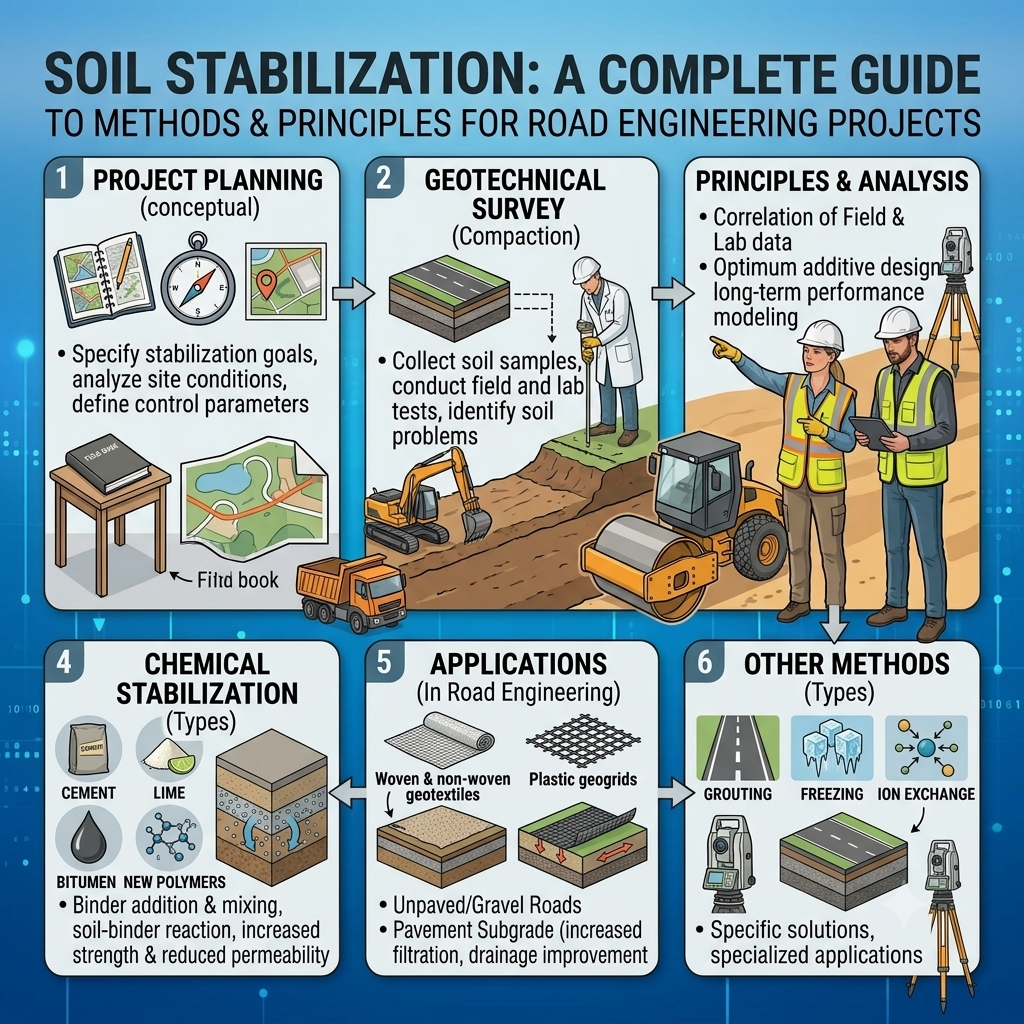
Roads, highways, airports, railways, and building foundations all depend on strong and stable soil. Unfortunately, natural soil does not always possess the strength, durability, or load-bearing capacity required for modern infrastructure. Weak, expansive, or water-sensitive soils can cause settlement, pavement cracking, rutting, slope failures, and costly maintenance. Civil engineers solve these challenges through Soil Stabilization, a process that improves the engineering properties of soil to create a stronger and more reliable foundation.
Soil Stabilization plays a vital role in highway engineering because every pavement layer relies on the stability of the subgrade. Improving the soil before construction increases bearing capacity, reduces plasticity, minimizes water infiltration, and extends pavement service life. Modern stabilization techniques combine traditional mechanical methods with advanced chemical additives and sustainable materials to achieve long-term performance.
This comprehensive guide explains the principles, methods, engineering applications, practical examples, and best practices of Soil Stabilization. Whether you are a civil engineering student, highway engineer, contractor, or infrastructure professional, understanding this topic will help you design and construct durable transportation facilities with confidence.
What is Soil Stabilization?
Soil Stabilization is the process of improving the physical and engineering properties of soil so it can safely support structures and transportation infrastructure. Engineers modify the soil by changing its composition, increasing its density, or adding stabilizing agents that improve strength and durability.
The primary goal is to transform weak or unsuitable soil into a stable construction material capable of carrying design loads throughout the project’s service life.
Objectives of Soil Stabilization
- Increase soil strength
- Improve bearing capacity
- Reduce settlement
- Minimize shrinkage and swelling
- Lower permeability
- Improve durability
- Enhance compaction characteristics
- Extend pavement life
- Reduce maintenance costs
In highway engineering, stabilized soil forms a dependable foundation for pavement layers, reducing the risk of premature failures.
Why Soil Stabilization is Important
Many construction sites contain soils that cannot safely support roads or buildings without improvement. Clay soils expand during wet weather and shrink during dry periods, while loose sandy soils may lack sufficient strength under traffic loads.
Without stabilization, these conditions often result in:
- Pavement cracking
- Rutting
- Differential settlement
- Surface deformation
- Increased maintenance costs
- Reduced service life
Benefits of Soil Stabilization
- Improves structural performance
- Reduces construction costs by limiting excavation and replacement
- Increases pavement lifespan
- Improves resistance to moisture damage
- Enhances load distribution
- Supports sustainable construction by utilizing in-situ materials
Practical Example
A highway project passes through an area with expansive clay soil. Instead of removing thousands of cubic meters of unsuitable material, engineers mix lime into the soil, compact it to the required density, and create a stable subgrade. This approach saves time, reduces costs, and improves pavement performance.
Engineering Principles of Soil Stabilization
Successful stabilization depends on understanding how soil behaves under load, moisture, and environmental changes.
1. Load Distribution
Stable soil spreads traffic loads over a larger area, reducing stress on the subgrade and minimizing pavement deformation.
2. Particle Interlocking
Compaction and proper grading improve contact between soil particles, increasing shear strength and stability.
3. Chemical Reactions
Chemical stabilizers such as cement and lime react with soil minerals to form cementitious compounds that bind particles together.
4. Moisture Control
Maintaining optimum moisture content allows engineers to achieve maximum dry density during compaction.
5. Density Improvement
Higher density reduces air voids, increases strength, and limits water infiltration.
Soil Stabilization Mechanism
The stabilization process modifies soil properties through mechanical action, chemical bonding, or a combination of both.
Simple Soil Stabilization Diagram
Weak Soil
    │
    ▼
Site Investigation
    │
    ▼
Select Stabilization Method
    │
    ▼
Add Stabilizer / Mechanical Mixing
    │
    ▼
Compaction
    │
    ▼
Quality Testing
    │
    ▼
Stable Subgrade
This systematic approach ensures that the treated soil meets the strength and durability requirements of the project.
Types of Soil Stabilization
Civil engineers choose a stabilization method based on soil type, moisture content, project requirements, and available materials.
1. Mechanical Soil Stabilization
Mechanical stabilization improves soil strength without adding chemical agents. Engineers modify the soil by blending different materials, grading particle sizes, and compacting the mixture.
Common Mechanical Methods
- Mixing coarse and fine aggregates
- Compaction using rollers
- Replacing weak soil with granular material
- Blending different soil types
Equipment Used
- Motor graders
- Vibratory rollers
- Sheep-foot rollers
- Water tankers
- Bulldozers
Advantages
- Simple construction
- Lower material costs
- Immediate improvement
- Suitable for granular soils
Limitations
- Limited effectiveness for highly plastic clay soils
- Performance depends heavily on proper compaction
2. Chemical Soil Stabilization
Chemical stabilization enhances soil properties by adding materials that react with soil particles and improve strength.
Common Stabilizers
- Cement
- Lime
- Fly ash
- Bitumen
- Industrial by-products
- Proprietary chemical additives
Benefits
- High strength gain
- Improved durability
- Reduced plasticity
- Better moisture resistance
- Longer pavement life
Engineers commonly use this method when soils exhibit high plasticity or poor load-bearing capacity.
3. Cement Stabilization
Cement stabilization ranks among the most reliable methods for highway construction.
Engineers mix Portland cement with soil and water to create a hardened matrix that significantly improves strength.
Suitable Soils
- Sandy soils
- Silty soils
- Well-graded granular soils
- Selected clay soils
Construction Process
- Spread cement uniformly.
- Mix thoroughly with soil.
- Add water to reach optimum moisture content.
- Compact immediately.
- Cure the stabilized layer.
Advantages
- High compressive strength
- Excellent durability
- Good resistance to water
- Reduced deformation under traffic
Practical Example
Many highway base layers and industrial access roads use cement-stabilized soil to provide a strong foundation capable of supporting heavy vehicles.
4. Lime Stabilization
Lime stabilization works particularly well for clay-rich soils with high plasticity.
When lime reacts with clay minerals, it reduces plasticity and increases strength through pozzolanic reactions.
Suitable Applications
- Expansive clay soils
- Embankments
- Highway subgrades
- Rural roads
Benefits
- Reduces swelling
- Improves workability
- Increases bearing capacity
- Enhances long-term durability
Engineering Tip
Engineers often perform laboratory tests to determine the optimum lime content before field application.
5. Bituminous Stabilization
Bituminous stabilization improves water resistance and flexibility by coating soil particles with asphalt or bitumen.
Common Uses
- Low-volume roads
- Rural highways
- Temporary haul roads
- Surface improvements
Advantages
- Excellent moisture protection
- Increased flexibility
- Reduced dust generation
- Improved resistance to erosion
Limitations
- Higher material costs
- Limited effectiveness for highly plastic soils
- Temperature-sensitive during construction
6. Fly Ash Stabilization
Fly ash stabilization provides an environmentally friendly solution by recycling industrial by-products.
When combined with lime or cement, fly ash forms strong cementitious compounds that enhance soil performance.
Advantages
- Sustainable construction
- Lower material costs
- Improved strength
- Reduced waste disposal
- Better resistance to shrinkage
Typical Applications
- Highway embankments
- Pavement subgrades
- Industrial yards
- Airport pavements
Practical Applications of Soil Stabilization
Soil Stabilization supports a wide range of civil engineering projects, including:
- National highways
- Expressways
- Rural roads
- Airport runways
- Railway embankments
- Bridge approaches
- Industrial platforms
- Parking areas
- Residential developments
- Earth dams and embankments
Real-World Example
During the construction of a four-lane highway across soft clay terrain, engineers used lime stabilization to improve the subgrade. The treatment reduced soil plasticity, increased bearing capacity, and eliminated the need for extensive soil replacement. As a result, the project achieved lower construction costs and a more durable pavement foundation.
Soil Stabilization Process Overview
Natural Soil
      │
      ▼
Soil Investigation
      │
      ▼
Laboratory Testing
      │
      ▼
Selection of Stabilization Method
      │
      ▼
Mixing & Moisture Conditioning
      │
      ▼
Compaction
      │
      ▼
Curing (If Required)
      │
      ▼
Quality Testing
      │
      ▼
Ready for Pavement Construction
This workflow highlights the logical sequence that engineers follow to achieve a stable and durable subgrade.
Key Takeaways
Soil Stabilization forms the foundation of successful road and infrastructure projects by improving weak soils before construction begins. Mechanical stabilization increases strength through proper grading and compaction, while chemical methods such as cement, lime, bitumen, and fly ash modify soil properties through engineering reactions. Selecting the right stabilization technique depends on soil characteristics, traffic loading, environmental conditions, and project objectives. Careful investigation, laboratory testing, and proper field execution ensure that stabilized soils provide the strength, durability, and long-term performance required for modern highway engineering.
Step-by-Step Soil Stabilization Process
Every successful Soil Stabilization project follows a systematic construction procedure. Each stage builds on the previous one to produce a stable, durable, and uniform foundation for highways and other civil engineering structures.
Step 1: Site Investigation
Engineers begin by studying the site conditions. They examine the soil profile, groundwater level, drainage pattern, and topography.
Activities
- Visual site inspection
- Borehole drilling
- Trial pits
- Soil sampling
- Groundwater assessment
A detailed investigation provides the information required to select the most suitable stabilization method.
Step 2: Laboratory Testing
Laboratory testing identifies the engineering properties of the soil.
Common Tests
- Grain Size Analysis
- Atterberg Limits
- Moisture Content Test
- Standard and Modified Proctor Tests
- California Bearing Ratio (CBR)
- Unconfined Compressive Strength Test
- Specific Gravity Test
The results help engineers determine the correct stabilizer type and dosage.
Step 3: Selection of Stabilization Method
Engineers compare soil characteristics with project requirements before choosing a stabilization technique.
| Soil Condition | Recommended Method |
|---|---|
| Expansive Clay | Lime Stabilization |
| Sandy Soil | Cement Stabilization |
| Silty Soil | Cement or Fly Ash Stabilization |
| Moisture-Sensitive Soil | Bituminous Stabilization |
| Poorly Graded Soil | Mechanical Stabilization |
The selected method should satisfy strength, durability, cost, and environmental requirements.
Step 4: Site Preparation
Contractors prepare the construction area before placing any stabilizing material.
Activities Include
- Clearing vegetation
- Removing unsuitable material
- Leveling the surface
- Adjusting moisture content
- Marking work zones
Proper preparation creates uniform working conditions and improves construction quality.
Step 5: Mixing the Stabilizer
The stabilizing material is spread evenly across the prepared surface and mixed thoroughly with the soil.
Mixing Equipment
- Rotary mixers
- Reclaimers
- Motor graders
- Disc harrows
Uniform mixing ensures consistent strength throughout the treated layer.
Step 6: Moisture Conditioning
Engineers adjust the moisture content until it reaches the Optimum Moisture Content (OMC).
Water trucks distribute moisture evenly before final compaction.
Maintaining the correct moisture level allows the soil to achieve maximum density.
Step 7: Compaction
Compaction increases density and improves soil strength.
Equipment Used
- Vibratory rollers
- Sheep-foot rollers
- Pneumatic rollers
- Smooth drum rollers
Engineers compact the soil layer by layer until it satisfies the required density.
Step 8: Curing
Chemical stabilization methods require curing to allow engineering reactions to develop.
Typical curing periods range from 3 to 28 days, depending on the stabilizer and project specifications.
Proper curing increases strength and durability.
Step 9: Quality Control Testing
Engineers verify that the stabilized soil satisfies project requirements before placing pavement layers.
Only approved sections move to the next construction stage.
Equipment Used in Soil Stabilization
Modern equipment improves productivity and construction quality.
Survey Equipment
- Total Station
- GPS
- Auto Level
Earthmoving Equipment
- Excavators
- Bulldozers
- Motor Graders
Mixing Equipment
- Soil Reclaimers
- Rotary Mixers
- Agricultural Disc Harrows
Compaction Equipment
- Smooth Drum Roller
- Vibratory Roller
- Sheep-foot Roller
- Pneumatic Roller
Watering Equipment
- Water Tankers
- Sprinkler Trucks
Quality Control and Field Testing
Quality assurance ensures that stabilized soil performs as intended throughout its design life.
Field Tests
- Field Density Test
- Moisture Content Test
- Plate Load Test
- Dynamic Cone Penetrometer Test (where applicable)
Laboratory Tests
- California Bearing Ratio (CBR)
- Unconfined Compressive Strength
- Proctor Compaction Test
- Atterberg Limits
- Grain Size Distribution
Acceptance Criteria
Engineers verify:
- Required density
- Moisture content
- Layer thickness
- Surface level
- Uniformity
- Strength development
Regular testing reduces construction defects and improves pavement performance.
Advantages of Soil Stabilization
Proper Soil Stabilization offers significant engineering and economic benefits.
Engineering Advantages
- Increases bearing capacity
- Improves shear strength
- Reduces settlement
- Controls swelling and shrinkage
- Improves durability
- Enhances load distribution
Construction Advantages
- Faster construction
- Reduced excavation
- Lower hauling costs
- Better use of local materials
Economic Advantages
- Lower project cost
- Reduced maintenance expenses
- Longer pavement service life
- Improved lifecycle performance
Environmental Advantages
- Less waste generation
- Reduced need for borrow materials
- Lower transportation emissions
- Greater use of recycled materials such as fly ash
Limitations of Soil Stabilization
Despite its advantages, stabilization has certain limitations.
- Unsuitable stabilizer selection can reduce performance.
- Poor mixing creates non-uniform strength.
- Excess moisture affects compaction quality.
- Some stabilizers increase initial construction costs.
- Certain soils require extensive laboratory evaluation before treatment.
- Weather conditions may delay stabilization work.
Proper engineering design minimizes these challenges.
Applications of Soil Stabilization in Highway Engineering
Soil Stabilization supports numerous transportation infrastructure projects.
Highway Applications
- Highway subgrades
- Pavement foundations
- Embankments
- Service roads
- Rural roads
- Expressways
- Airport runways
- Industrial access roads
Other Civil Engineering Applications
- Building foundations
- Railway embankments
- Earth dams
- Parking areas
- Container yards
- Port facilities
Best Practices
Engineers achieve the best results by following proven construction practices.
- Conduct detailed geotechnical investigations.
- Perform laboratory mix design before field work.
- Select stabilizers according to soil properties.
- Maintain optimum moisture content.
- Ensure uniform mixing.
- Compact each layer immediately after mixing.
- Protect stabilized soil during curing.
- Perform regular quality control testing.
- Keep detailed construction records.
- Monitor long-term pavement performance.
Practical Recommendations
Civil Engineers
- Base stabilization decisions on laboratory test results rather than assumptions.
- Verify field density after each compacted layer.
- Coordinate closely with material suppliers and contractors.
- Monitor curing conditions carefully.
Contractors
- Calibrate spreading and mixing equipment regularly.
- Avoid construction during heavy rainfall.
- Maintain consistent layer thickness.
- Follow approved construction specifications.
Engineering Students
- Learn the properties of different soil types.
- Understand laboratory testing procedures.
- Study pavement failures caused by weak subgrades.
- Visit highway projects using stabilization techniques.
General Discussion of IRC, AASHTO, and ICE Practices
Although project specifications vary by country, leading highway engineering organizations such as the Indian Roads Congress (IRC), the American Association of State Highway and Transportation Officials (AASHTO), and the Institution of Civil Engineers (ICE) emphasize several common principles for soil improvement:
- Carry out detailed geotechnical investigations before selecting a stabilization method.
- Design pavement layers based on subgrade strength and expected traffic loading.
- Verify material quality through laboratory and field testing.
- Achieve specified compaction levels before placing subsequent pavement layers.
- Provide effective drainage to protect stabilized soils from excessive moisture.
- Apply quality assurance throughout construction to ensure long-term pavement performance.
- Consider lifecycle cost, durability, and sustainability when selecting stabilization techniques.
These engineering principles help deliver safe, durable, and cost-effective transportation infrastructure.
Frequently Asked Questions (FAQs)
1. What is Soil Stabilization in civil engineering?
Soil Stabilization is the process of improving soil properties to increase strength, durability, and load-bearing capacity for construction projects.
2. Why is Soil Stabilization important for highways?
It strengthens weak subgrades, reduces settlement, improves pavement performance, and extends the service life of roads.
3. Which soils benefit most from lime stabilization?
Highly plastic and expansive clay soils respond particularly well to lime treatment because lime reduces plasticity and increases strength.
4. What is the difference between mechanical and chemical stabilization?
Mechanical stabilization improves soil through grading and compaction, while chemical stabilization modifies soil properties using additives such as lime, cement, or fly ash.
5. Which laboratory tests are essential before stabilization?
Engineers commonly perform Grain Size Analysis, Atterberg Limits, Proctor Compaction, California Bearing Ratio (CBR), and Moisture Content Tests.
6. Can recycled materials be used for Soil Stabilization?
Yes. Materials such as fly ash and certain industrial by-products can improve soil properties while supporting sustainable construction practices.
7. How does Soil Stabilization reduce construction costs?
It minimizes soil replacement, reduces material transportation, shortens construction time, and lowers long-term maintenance expenses.
8. What equipment is commonly used for Soil Stabilization?
Typical equipment includes rotary mixers, reclaimers, motor graders, water tankers, vibratory rollers, sheep-foot rollers, and survey instruments.
9. What factors influence the choice of a stabilization method?
Engineers consider soil type, moisture content, traffic loading, climate, project budget, material availability, and environmental requirements.
10. How does quality control improve stabilized soil performance?
Regular testing confirms that the stabilized layer meets design specifications for density, moisture, strength, and thickness, ensuring reliable long-term performance.
Conclusion
Soil Stabilization remains one of the most effective techniques for improving weak soils and creating reliable foundations for highways, airports, railways, and other infrastructure projects. By increasing bearing capacity, reducing plasticity, controlling moisture-related problems, and enhancing durability, stabilization enables engineers to construct safer and longer-lasting pavements while optimizing project costs. Choosing the appropriate stabilization method requires careful site investigation, laboratory testing, sound engineering judgment, and strict quality control throughout construction. Mechanical methods improve particle interlocking through grading and compaction, while chemical methods such as lime, cement, bitumen, and fly ash transform soil properties through beneficial engineering reactions. Following recognized engineering practices and maintaining proper construction standards help ensure that every stabilized layer performs as intended throughout its design life. For engineers, contractors, and students, understanding Soil Stabilization provides the knowledge needed to deliver sustainable, economical, and high-quality transportation infrastructure that meets modern performance expectations.

Kamran Malik is a passionate civil engineering writer and researcher who specializes in construction, transportation, structural engineering, and infrastructure topics. Through his articles on CivilEngineerings.com, he simplifies complex engineering concepts and shares practical insights, industry trends, and educational resources for students, professionals, and engineering enthusiasts.
Toonaangevende adult websites leveren veilig hoogwaardige expliciete inhoud.
Kies voor betrouwbare bronnen voor een discrete ervaring.